 |
| ... but do you have it in green??? |
I'll go ahead and drop the normal disclaimer that YouTube gets me in way too much trouble. I'd watched several build videos, but given the components I ended up going with, I'm going to firmly blame this one on (or maybe credit this to?) Darrell Braun Guitar. He used Warmoth products on a lot of his builds, and they looked absolutely spectacular. They also did a great job finishing the bodies and necks as well, and I really don't have the facilities to do a high-end finish on something as large as a guitar at present. The drawback there is that they're not exactly cheap either, but they'd still be a lot cheaper than buying a Gibson that wasn't 100% what I wanted, and I had the opportunity to hand pick literally everything from the pickups, to the bridge, to the tuning machines. So in short, I got to go shopping!!!!
The Pickups
I wanted P90 pickups for this particular guitar as it was the only major type of pickup I didn't have somewhere in my arsenal - it was honestly the whole point of the build. I shopped around and decided on Fralins for this build. They're hand made and available at a price point competitive with the more mass-manufactured versions. They arrived in a rather unassuming white box (photo below cropped from a larger image), but the pickups themselves looked nice, with high quality wiring and clear labeling of the neck and bridge.

Tuning Machines
Keeping guitars in tune can be challenging, but modern tuning machines can make that a lot easier. Along those lines I decided to go with Graph Tech Ratio locking tuners. The fact that they're locking tuners helps because the strings are less likely to shift once they're attached to the tuning peg itself. The Ratio tuners are nice because they are specifically geared to the gauge of each string, so you're not cranking like mad at one end and moving too far with the slightest touch on the other!

Electronics
As I was trying to build something sort of like an SG, I decided to go with the SG style for potentiometers, toggle switch, and jack. I picked up a StewMac Golden Age wiring harness. I figured since this was my first build that it would be easier to go with something that was pre-wired rather than having to wire the whole thing myself. It came with a pair of 0.022uF capacitors already wired in - which is great for Humbuckers, but many people recommend 0.047uF for P90s - so I picked up a couple of Orange Drop 0.047uF capacitors, but wasn't sure I'd actually put them in as I'd have to de-solder the wire from the volume pot to the switch as well, but I at least had the option!

Body, Neck, and Bridge
So the nice thing about a place like Warmoth, is you can specify exactly what you want and they'll build it. They have a lot of great dropdown menus that will let you select your options and a ton of different body styles to choose from. While I was trying to do something that was a Gibson homage, they're really set up more along Fender standard, but that is okay as I wasn't sure I was ready to glue in a neck! I picked the Diamondback body with the following key options:
- Solid mahogany construction (as that's what Gibson uses for the SG)
- Right handed (because I am...)
- Neck P90 Rout
- Bridge P90 Rout
- Controls set up in SG configuration
- Bridge and Stop Tailpiece Routs
- Studs for Bridge and Tailpiece pre-installed

I liked the Diamondback because it gave me the forward points like you see on an SG, but with the bolt on neck and more parallelogram shape it has a bit of a Stratocaster vibe to it as well - sort of an SG - Stratocaster hybrid?

Ordering the neck follows a similar process, but there are a few more options available. I went with the Vortex neck because it has the Gibson style 3x3 tuning machines, though in truth it looks far more like a PRS headstock than a Gibson. The Hombre neck looks a lot more like a Gibson, but I ended up liking the look of the vortex a bit more. For the neck I went with the following options:
- Maple shaft
- Indian Rosewood fretboard
- 12" Radius
- 22 Nickel Frets
- Abalone dot inlays (went with the green of the body)
- Abalone side dots (went with the abalone dot inlays - naturally)
I also picked up a TonePros Tune-O-Matic Bridge and Tailpiece in chrome from Warmoth. They installed all of the studs for me so I just had to add the bridge and tailpiece when it arrived.
Construction!
Centering the Pickups
With all of the major components picked out, I just had to wait (im)patiently for the parts to arrive. As with any custom shop - or even production shop - in the world at this point, Warmoth was backed up. They were quoting 3 months for custom orders to get out the door. Mine was further delayed by an issue in QC - when they went to install the bridge studs it messed up the finish on the body, so it had to go back for a redo. Major kudos for Warmoth QC, though as I'd rather have it done right than done fast.

When the body arrived, the most important thing was to get the spacing for the holes for the pickups right in the pickup routs. Because this was key to getting the whole build right, I took the body over to my woodworking expert friend as he had some tools I didn't have available to get the pickup screw holes done correctly. (For followers of my other blog, this is the same friend I've been working on the gaming table with!) In the photo above you can see the (very!) green body and one of the pickups ready to get the holes going.

Any time you're drilling holes for screws in wood, it is always a good idea to double check and make sure your pilot holes are large enough to allow the screw to be inserted without stripping the head - but not so large that the threads don't hold. We did a quick and dirty test with a piece of scrap walnut (similar hardness as the mahogany body) from the aforementioned game table. Once we'd found the right bit, we had to carefully mark the locations of the two screws for each pickup.

To make that happen, we installed the pickups (which fit very snugly with their caps) into the routed holes in the top of the guitar body. This gave us a way to mark center points on each of the four holes. I then used an awl (below) to make sure that the points were clear and punched for the next step.

I'd initially hoped we could just use his large drill press, but the uneven dimensions of the body and the small tables on the drill press precluded that option. Instead we decided to go with one of his drills with a plunge attachment. The table on that could sit on top of the body and be perfectly perpendicular to the pickup routs.

The only problem with the attachment is it is solid steel - like 1960s - 1970s solid steel. So we took a page from the other project, and blue taped the heck out of it. That would give it a smooth surface that wouldn't mar the finish of the guitar body, but would still allow us to drill all of the holes.

After that it was a fairly simple matter to have him hold the drill steady while I drilled the holes. As with most things, it took us about 10 times as long to mark and set up the holes as it did to actually drill them. The old axiom "measure twice, cut once" completely understates how methodical you have to be in precision woodworking most of the time!
The Electronics
Once the holes for the pickups were drilled, I brought the whole thing back home to begin shielding and working on the electronics. I picked up some copper shielding tape from StewMac. Granted, there are a lot of different options for shielding the inside of an electric guitar, and most of them are cheaper than the StewMac conductive copper tape, but their tape also has conductive adhesive, so any join between layers doesn't have to be soldered (or otherwise connected!).

In the photo above you can see the cavity for most of the real guts of the guitar - the pots, jack, toggle switch, and capacitors. You can also see the wires for the pickups and the pre-installed ground (the black wire) peeking through. I haven't opened up the holes for the hardware yet, but as you can see I covered the entire interior of the cavity and added conductive tape to the cover as well to make essentially a faraday cage. I forgot to take a picture of the pickup routs before installing the P90s, but for those I shielded the bottom while leaving most of the sides open as well as the caps.

Flipping the body over, you can see the lovely transparent green finish and the copper tape peeking through from the other side. I went ahead and opened the holes up and prepared to add the electronics to the body. As I'd mentioned before, I picked up a pre-wired Golden Age SG set. The only wiring I'd planned on doing was attaching the pickups and the ground, but as with so many projects, that's when I hit the first major snag.

I'd planned on adding a custom "Rhythm/Treble" plate to this build - in fact it was already on order, but hadn't yet arrived. Unfortunately the Warmoth body is just a bit thicker than an SG body, which means the L-shaped toggle switch doesn't have long enough threads to go through the body and still leave clearance for the plate. No biggie, I think to myself, I can just swap it out for a Les Paul style switch with longer threads...

Well, unfortunately in the photo above you can see the problem with that approach. While the LP switch had plenty of clearance, now the ground and pickup connector wires were much too short (by the way, I'm keeping this Golden Age template as if I ever want to do something like this again, the template is a real life saver!). So after uttering a few choice words, I realized the best thing to do would be to re-wire the whole thing. New ground. New pickup connections. While I was at it I could add those larger orange drops - why the heck not?!?!

I started with the new ground wire at the toggle switch and then moved back stepwise toward the jack. As I got to each pot, I'd de-solder the old wire and then add the new. Honestly, de-soldering the old ground and replacing it with the new ground was the most difficult part of the whole re-wiring - I'm totally doing my own wiring if I ever do this again! Once I made it back to the jack, I then cut new pickup wires, de-soldered the old ones - including the caps, and added the new ones. Once I was done I double checked the connections to make sure the ground path was clear. My digital multimeter gave me the thumbs up, so I kept going.

The next step was a little tricky as I had to solder the pickup leads to their respective pots (signal and ground) and attach the bridge ground. Once that was done, I again double checked the connections with the DMM, and seeing no issues at that point, I proceeded to install all of the electronics into the cavity.

Because I'd used the template, the installation of the electronics was pretty simple as everything was already laid out and soldered in the correct geometry. At this point I simply screwed on the back cover and moved on to the next step.
Tuning Machines
Ratio tuners come with a fairly dizzying array of attachment options. As I wasn't using a true Gibson neck, I decided to go with the single screw mounts (pictured below). These weren't terribly hard to install, but once again it pays to take time to measure things out ahead of time. I loosely installed the tuners and used a straightedge to align them. I could then mark the hole for the screw. Once I'd drilled the holes for the screws, it was a simple matter of adding the mounts and then adding the tuners.

I unfortunately forgot to take a picture of actually attaching the neck to the body, but this is a Fender style neck - it's four bolts, a back plate, and a plate pad. Once the neck was attached I figured I might as well string it up, do a very basic set-up, and see if I had a semi-functional instrument or if additional attention would be needed to get it to that point.

I went with Ernie Ball Regular Sinky 10-46 Gauge strings for starters. I'm running these on my Gibson LP as well as on my Epiphone Alex Lifeson LP, so I figured I'd keep them somewhat consistent. The Ratio locking tuners were intuitive to use and it didn't take me long to get the strings on and brought into tune. I could immediately tell that the truss rod was going to need some work and the action wasn't set properly, but even so intonation at the 12th fret was really quite close, so I decided to go ahead and take the plunge and try it out.
And... it... WORKED!!!!
It sounded good too - especially for a totally un-set-up guitar in the rough! I'd expected a certain amount of hum from the P90s, but they were really very quiet. I was able to switch between the bridge, neck, and both pickups with no problem. Once I was over the initial shock I let the guitar sit for a day to settle in, and this evening I worked on setting it up as well as my meagre skills allowed. I had fretboard straightedge, and it confirmed that the neck was bowed forward a bit. It only took about 1/2 a turn on the truss rod to bring it into alignment. I then set the action height to match my Les Pauls and tuned from the bridge as best I could. Everything but the low E string is pretty much spot on, and the low E string is only a sneeze sharp at the 12th Fret.

So the guitar is now together and playable as you can see in the photo above. I added some volume and tone control knobs with an abalone effect to help tie the neck and the body together. I really like the end effect. However, the guitar is not quite finished at this point. I'm still waiting on a few things, and I need to decide about a couple of other options before I call it 100% complete. I have a custom truss rod cover and toggle switch plate on order, but they haven't arrived yet. I'm also toying with the idea of getting a custom pick-guard for it - something like what you see below on a Gibson SG Standard.
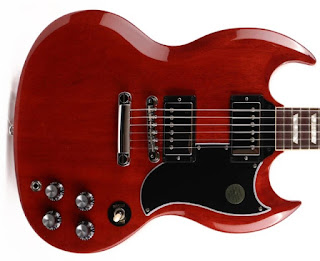
Although they do several custom pickguards, Warmoth unfortunately doesn't offer a pick-guard at all for the Diamondback body. It looks like I'd probably have to template this one from scratch myself, which may make it easier to just buy some material, make an MDF template, and go from there. I also have decided on any additional brand name / makers mark on the headstock, and I'd like to figure out how to add a serial number to it without totally screwing up the finish as well. If anyone has any thoughts, I'd love to hear them! I'll also continue to post update pictures as they're available, but honestly for my first guitar build, not only did I have a lot of fun, but I truly love the result. It's a joy to play and I'm really looking forward to learning what this baby can do!


No comments:
Post a Comment