 |
| Early V1 BMP - Photo from Kitrae's page |
After my guitar lesson on Saturday, I stopped by a local electronics store, SurplusGizmos. They've got a little bit of everything if you're willing to dig through the store looking for it. It's one of those places where you can lose a few hours and still walk out for less than $50 if you just need odds and ends. I spent about an hour rummaging through diodes, resistors, and capacitors to get enough parts for several planned builds. Of course, I ended up having to put all of the capacitors in one baggie which meant I had to re-sort everything when I got home!

As you can see from the PCB above, this one is almost totally old school. All of the resistors are Allen Bradley carbon resistors - even the RPD (and the LED resistor on the bypass board, not pictured). All but two of the capacitors are ceramic. I forgot to snag a couple of 10n capacitors, but as the store was getting ready to close, I had to cut things short. I'll likely head back next week and pick up a few more things. The diodes are all old school 1N914 as well - sadly my stock of these is starting to dwindle. The transistors are also classic 2N5133. The only truly modern component on the main board is the new electrolytic which is one of the power supply filter capacitors. The resistance / capacitance values match the first version of the Violet Ram's Head BMP.

I took an angled view of the PCB as the top view just didn't do it justice at all. Granted, it is a modern PCB, but all of the guts completely evoke the originals right down to the color of the ceramic capacitors. This was yet another build where I wasn't sure if I'd end up with a functional pedal or not. Old electronic components can be very finicky, and though I'd tested the parts, it was entirely possible that one or more wouldn't actually hold up to the strain. However, once it was together, I hooked it up to my tester (as seen in my recent Cornish P-2 build) and it lit right up, so it was ready to test!
Sound-wise, the pedal is unmistakably a BMP. The noise floor is higher than on my builds with more modern components, but honestly no worse than the first BMP I built, and maybe not quite as high as the Sabbra Cadabra build I recently finished. In other words, the noise floor is nothing that isn't easily handled by my noise gate. If anything, the sound is a bit harsher or fuzzier than some of the other clones. I don't think it would supplant my Ram's Head 2 or the P-2, but the sound is right up there among my favorite BMP pedals - maybe just behind the Triangle version?
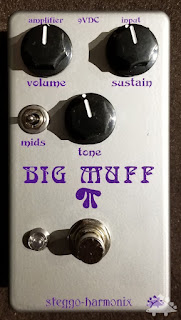
For the enclosure, I went with essentially a clone of the Violet Ram's Head 2 one I'd done earlier, though this time I had Tayda do a UV print on the enclosure so I could do it in... well... violet. I absent-mindedly forgot to put a purple LED in this one like I did the VRH2, so it will have to live with a red one for now. I picked up plenty of ceramic capacitors, so I can continue to experiment with them on future vintage builds.
No comments:
Post a Comment