
So faced with the dilemma of finding a guitar I loved, but hated the look of the available models, I did what any enterprising amateur luthier would do - I decided to build my own! Since this time around I was trying to replicate an actual Fender Guitar, I went back to Warmoth for the body (since Fender licensed bodies and necks are their specialty). Given I've now had time to digest the lessons from my previous Warmoth build, I carefully researched all of the various body options that might work for the Noventa. The easiest thing to do would have been to simply pick up a Warmoth Jazzmaster body and go from there. However, the Noventa Jazzmaster controls are very different from a conventional Jazzmaster. The Noventa makes do with a single volume and tone and a 5-way switch and dispenses with the Lead Circuit and Rhythm Circuit controls. This means all of the routing required for those circuits is superfluous on the Noventa.
 |
| New Gear Day! After a 3 month wait, the body arrives! |
Warmoth offers what they call a Split Jazzmaster body - one where the top isn't routed by default and there is solid wood around all of the pickups allowing you to screw them directly into the body. They also offer a "split" pickguard which gives a slightly different look, but I decided to take it one step further and only use the lower half of the split pickguard. Limiting the pickguard area (while retaining the functionality of attaching the pots, jack, and selector switch to the pickguard) allowed me to go with a more elaborate body finish, and I really wanted to go with a nice finish. I'd seen some wonderful flame maple tops with a black cherry burst dye, and what had been seen, could not be unseen!

As always, Warmoth's production line was incredibly backed up and after ordering the body, it took three months or so to arrive. What can I say, they make a quality product and I'm glad they're not cutting corners to get more out the door. That being said, there were no finish issues this time around (my previous body had to be stripped and resprayed leading to an extra four week delay) and when I received the guitar body my jaw well and truly hit the floor. They'd outdone themselves and I knew I had an extremely solid foundation for the rest of the build. The technical details of the body are below:
- Split Jazzmaster® Guitar Body
- Construction: Solid
- Core Wood: Swamp Ash (the original Noventas are Alder, but I decided to go with Ash)
- Laminated Top Wood: Flame Maple
- Control Cavity: Top Rout
- Neck Pickup Rout: P90
- Middle Pickup Rout: P90
- Bridge Pickup Rout: P90
- Bridge Rout Type: Tremolo
- Bridge Rout: Jazzmaster Tremolo w/ Jazzmaster Bridge
- Mounting Holes: Standard 4-Bolt
- Paint Category: Dye
- Top Color: Black Cherry Burst Dye
- Back Color: Black (Burst-over)
- Satin or Gloss: Gloss
 |
| The joy of being a kid in a candy store - as an adult! |
By and large for the rest of the build I went with Fender parts. Like I said, I liked the Noventa Jazzmaster - I just hated the colors - so I wanted to replicate the feel and sound of the original as closely as possible. For the pickups and electronics, I went ahead and bought a set from a Noventa Jazzmaster from STRATosphere. The wiring is dead simple consisting of a 5-way switch, volume pot, tone pot, jack, and ground wire. I decided I was going to make one tiny deviation from the standard Noventa set-up. Instead of using the stock 5-way switch (neck, neck-mid, mid, mid-bridge, bridge), I would upgrade it to a 6-way switch which would include all of the above and add a neck-bridge setting as well.
Part summary:
- Body - Warmoth Split Jazzmaster
- Neck - Fender Noventa Jazzmaster
- Pickups / Electronics - Fender Noventa Jazzmaster
- Switch - 6-way Oak Grigsby
- Tuners - Grotoh Locking Tuners
- Tremolo - Fender American Professional II (upgrade from the Noventa)
- Bridge - Fender American Professional II (upgrade from the Noventa)
- Pickguard - Warmoth Split Jazzmaster (at least initially... this ended up changing!)

With the body in hand, I started working on getting the parts I needed removed from the original Fender pickguard (which I'll likely sell off as I have no need for the pickguard, and it is perfectly good otherwise!).

It turns out the tone and volume pots are both A500K. I find this a little surprising as on most pedals tone controls are linear, not log, potentiometers, but as I said, I'm trying to keep the electronics as original as possible, so I decided to just run with it - at least for the potentiometers and capacitors. With the pots and switches removed, it was time to move on to actually setting the pickups in the body.

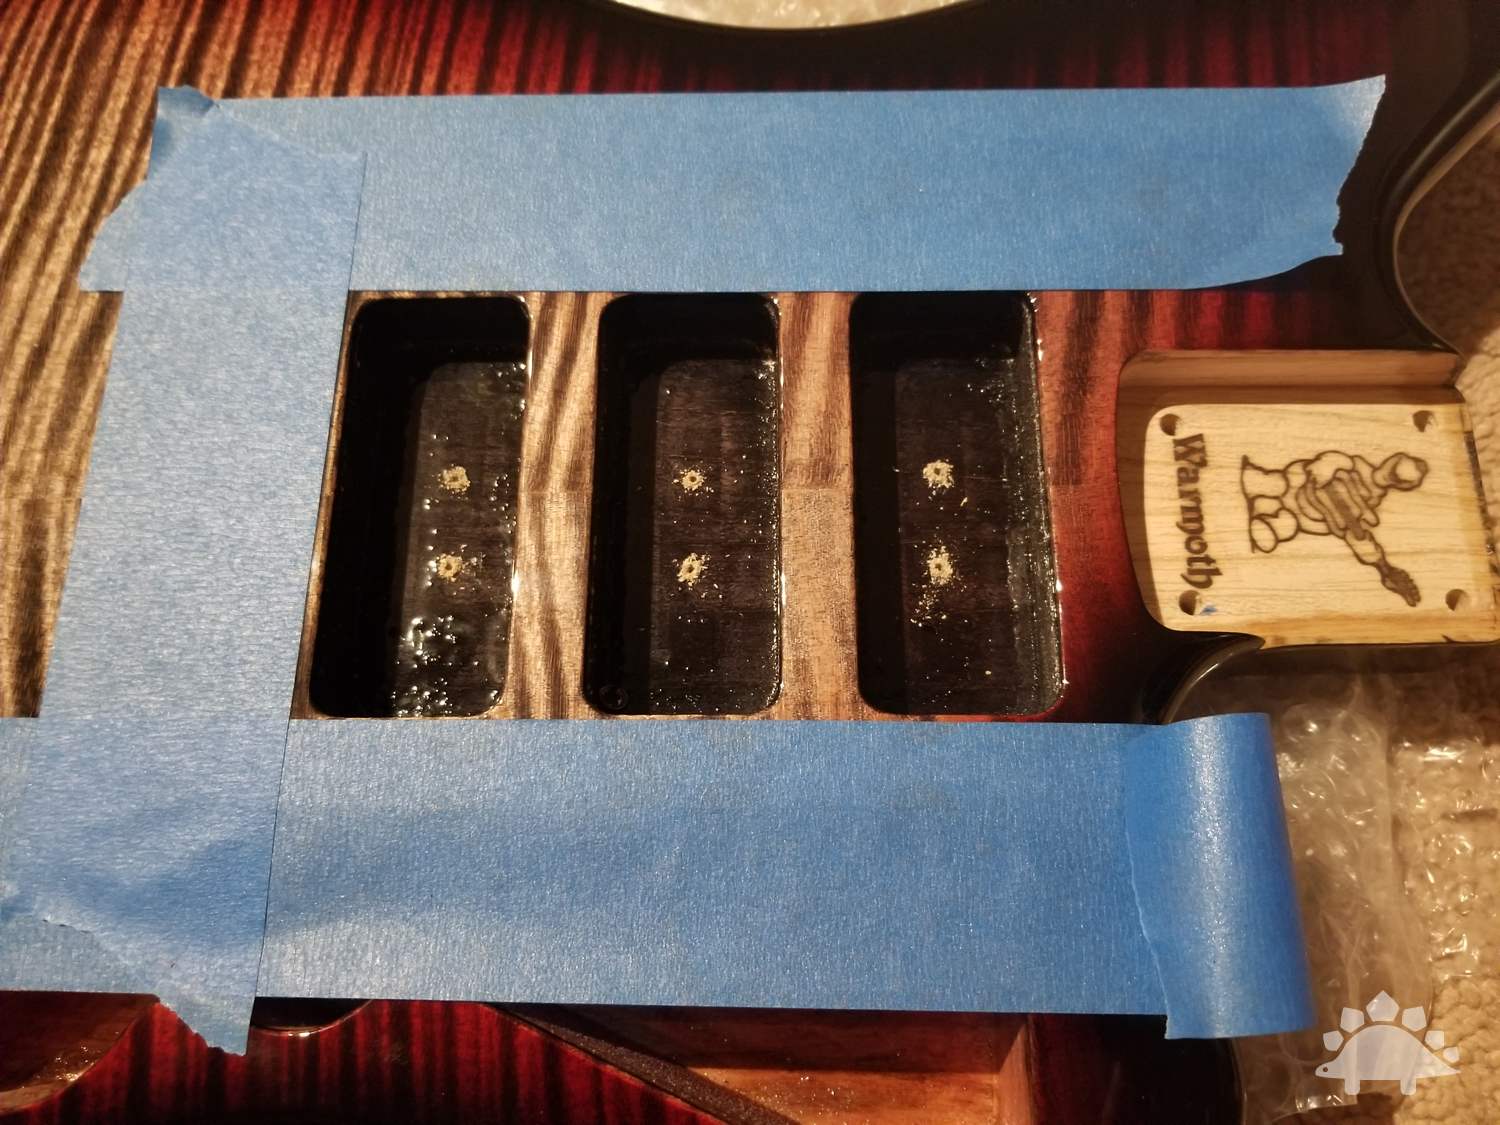
I used the same technique to align the pickups in the Split Jazzmaster body as I did on my previous Diamondback build. I simply put the pickup caps into the routs which allowed me to site the holes that would need to be drilled for the screws.

With the holes marked, I then covered the surface of the body in blue painter's tape to prevent my drill's plunge attachment from scratching the gloss surface. Yes, I've picked up my own plunge attachment and I'm not borrowing my carpenter friend's drill this time around!

Drilling went much as before - of course, I had three pickups to drill pilot holes for rather than two, but it still went quickly.
Once the holes were drilled, I could start moving on to preparing the control cavity. Once again I used Stewmac copper conductive tape. The conductive adhesive on the Stewmac tape makes it worth the extra cost because it would be a real pain to have to connect strips of tape together separately!

I went ahead and bought a Noventa Jazzmaster neck directly from Fender (below). STRATosphere didn't have one available in Pau Ferro, which I'd liked better than maple on the Noventas I'd played. The only drawback of buying the neck directly from Fender is the nut is not dressed. It has pilot holes cut, but that's it. It also doesn't have the string guides set. I picked up some Fender string guides, but they aren't yet installed.

After debating back and forth, I decided to not attempt to dress the nut on my own. I'm not building enough guitars at this point to justify the expense of getting the correct tools and files to properly set up the nut on this guitar. That means I also didn't want to set the string guides as they'd likely need to be done in conjunction with dressing the nut. I'm therefore going to take this to Ian Pender at Five Star to finalize the set-up.

With those decisions made, the only thing I could do on the neck was to go ahead and install the locking tuners. I had to set the collars (carefully!), but then screwing in the tuners themselves was a breeze. It was so easy I apparently forgot to take a picture of the neck after I installed the tuners... typical!
By this point I'd gone ahead and soldered the six-way switch to the pickups and potentiometers (below). I'd also decided to swap out the stock jack for a Pure Tone Mono jack. I went ahead and plugged the jack into my practice amp and did the "tap test" on all of the pickups through all of the switch settings to verify functionality. Everything was in great shape, so onward and upward!

If you know anything about grand projects, almost all of them have that fatal period called... a lull! The lull in this project came when I went to finalize the pickguard for this build. Unfortunately Warmoth isn't set up to provide a Split Jazzmaster pickguard with a 5-way selector switch. I wasn't incredibly happy about that, but decided I'd bite the bullet and get one without the slot cut and I'd add it myself (especially since the slot actually would have to be lengthened to accommodate the 6-way switch). I managed to get the slot and the holes for the switch retaining screws cut. It wasn't a perfect job, but it was serviceable. I then went to put the pickguard on the guitar, and while the black pickguard matched the black pickup covers, it just made the whole bottom half of the guitar look dead and lifeless. In short, even if I'd cut the pickguard perfectly, it just wasn't working visually on the guitar.
So, once again I was back to the drawing board trying to figure out what would work. I still needed a dark pickguard, but I wanted to go with a beveled rather than straight edge. It also ideally needed something to make it stand out - it needed to be 3-ply, or some different material that would both integrate into the overall look of the instrument and simultaneously make it pop. Easy, right? After a couple of hours banging around on the internet, I thought I might just have found something that would work. After a little judicious Photoshop work to at least test the hypothesis, I got back in touch with Jeff at Halo Guitars to make me another custom pickguard. Only this time, it was going to be in carbon fiber!

Once I'd ordered the pickguard from Halo, it (of course) took several weeks to get here between manufacturing, shipping, and a couple of COVID lockdowns. However, once it arrived the pickguard once again exceeded my expectations. This is not a simulated carbon fiber pickguard, it is real carbon fiber. It is light, it is strong, and it is beautiful. The only downside is... it wasn't exactly cheap. However, I needed something to really pull the look of this guitar together, and this was hopefully going to do it!

As the pickguard on the Jazzmaster covers the control cavity, I went ahead and added copper tape to the back of it just like it was on the original pickguard. In the photo below you can see it peeking through before I re-opened all of the holes.

I'd previously lined up the pickguard on the body to locate the screw pilot holes for the pickguard. After the traditional gut-check, I managed to get all of the holes for the pickguard drilled into the body without incident. I did end up having to open up the control cavity rout ever so slightly to get the six-way switch to fit. If I had to do this again, I'd move the six way switch back and set it into the pickguard at an angle.

As the pots, switch, and jack were already wired, the thimbles for the bridge were in place, and the tremolo was screwed in, I could now add the pickguard and neck to the body. The end result is below, and all I can say is... wow...

This is the guitar I wish Fender had made (if they'd made the Noventa Jazzmaster in the Crimson Red Transparent - that would have at least been in the right zip code, though). It is absolutely beautiful, but unfortunately I've taken it as far as my tooling can take it. While I could easily add the string guides and string the guitar as-is, the nut isn't dressed, and the guitar really needs that done properly to reach its full potential. So, I'm stopping here and taking it to Ian. Once he's had a chance to dress the nut, string it, and set it up, I'll post pictures of the ready to play instrument. So close... and yet so far!


No comments:
Post a Comment