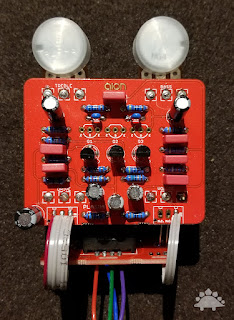
As you can see from the photo above, the board follows the modern AionFX standard of having a main board with a separate bypass board for the 3PDT switch. As with most boost / gain pedals, the heart of the circuit is its transistors. The normal build calls for commonly available 2N5088s, and the top (unpopulated) row of transistor locations is set up for them using the conventional US layout for emitter, base, and collector. One really nice feature of this board is that alternate locations are provided for more period transistor options. The PCB locations I used were actually set up for TO-18 or TO-92 can transistors, but I'd picked up some Fairchild BC184 transistors to better match the ones in the original unit from pedalhacker, and those dropped into the can slots without issue.
As I built this pedal during the time that I really couldn't work on enclosures as my computer was down, I went ahead and attached the potentiometers and fully wired the pedal. I'd built up a series of pedal testers that allow me to fully check a pedal out before I actually put it into the enclosure, and it worked beautifully!
For the enclosure, I decided to go with something that looked very similar to the original. I've gone this route with a few pedals (mostly Big Muff Pi clones and the Dimension C pedal) and figured I'd try my hand at matching this one since I liked its overall look. I also went with the "sand texture" on the black enclosure from Tayda as it resembled the hammered look of the original pedal as well. This is the first pedal I've built from scratch with this particular enclosure, though it is similar to the black textured enclosures you get in the full AionFX kits. I really like it, and may find an excuse to do more in this style.


No comments:
Post a Comment